Friday, October 17, 2014

How to only show Notifications for certain inboxes in Mac Mail

Though I use several email accounts in Mac Mail, I primarily care about one of the accounts. For the past few years, I've ignored notifications for the other accounts, but I finally decided to do something about it. The solution is a bit unintuitive, but it serves its purpose.

Looking in Notification Center system preferences on Yosemite (10.10), there's simply generic settings for how/when you want them to show. Under the Mail section of said pane, I have this set to "Banners". This applies for any and all notifications that are generated by Mail.

The best solution I was able to put together was this:
  1. Open Mac Mail
  2. Mailbox menu -> "New Smart Mailbox..."
  3. Use the following settings (bold are my inputs and underlines are dropdowns):
    • Smart Mailbox Name: Notifications (use anything you want)
    • Contains messages that match any of the following conditions
    • Message is in mailbox [some inbox]
  4. Add as many conditions as you want, and then press OK
  5. Mail menu -> Preferences
  6. Set the "New message notifications" dropdown to the name of your smart mailbox
You now will only receive notifications for messages that match the smart mailbox conditions.
Thursday, June 13, 2013

How to Enable WebGL in Safari

  1. Go to the Safari menu and click Preferences.
  2. Click on the Advanced tab.
  3. Tick "Show Develop menu in the menu bar".
  4. Go to the Develop menu and click Enable WebGL.
Friday, September 21, 2012

How to disable Facebook and Twitter integration in Mountain Lion

While for some people this may be a killer feature, I hardly use Facebook or Twitter and have no plans to share content through those services. Email suits me just fine. As such, I didn't want to have those listed in Mountain Lion's Share Sheets. So, I grepped for Facebook and got this: $ find /System -name Facebook -print 2>/dev/null /System/Library/InternetAccounts/Facebook.iaplugin/Contents/MacOS/Facebook /System/Library/PrivateFrameworks/ShareKit.framework/Versions/A/PlugIns/Facebook.sharingservice/ Contents/MacOS/Facebook /System/Library/SocialServices/Facebook.socialplugin/Contents/MacOS/Facebook And for Twitter: $ find /System -name Twitter -print 2>/dev/null /System/Library/PrivateFrameworks/ShareKit.framework/Versions/A/PlugIns/Twitter.sharingservice/ Contents/MacOS/Twitter Preferring to do the least damage possible, I simply renamed Facebook.sharingservice to Facebook.sharingservice.old and Twitter.sharingservice to Twitter.sharingservice.old. After doing this, I quit Safari, reopened it, and gone were the Facebook and Twitter options. No guarantees this won't reenable on updates or break something else, but so far it seems to work. If nothing else, you can always rename the plugins back.
Tuesday, September 18, 2012

The quest for a free dynamic DNS (DDNS) service

Being self-hosted has its perks, but my ISP periodically updates my home IP, and often I don't notice until several days have gone by. I've looked for a while for free dynamic DNS services, as GoDaddy doesn't have this option, but the few I found had major problems I didn't want to deal with (e.g. limitations on the number of zones I could add, or a requirement to allow others to create free subdomains).

I finally ran across Namecheap's FreeDNS service, which was exactly what I wanted. This requires that you enable dynamic DNS on Namecheap's side, then have a client (such as ddns, ddclient, or any of the others listed here) running on your computer. To use their service (which does not require domain transfer or the purchase of any services, but is also available to those that have Namecheap accounts) you'll need to do the following:
  1. Sign up for a Namecheap account (or log into your existing account) here.
  2. Go here, type your domain name, then press "Get DNS". On the next page, click "Add DNS for Selected Domains".
  3. Now click on "OK! Go to the Hosted Domains Page". This will take you to your domain manager. Note that your domains will be listed in the "Hosted Domains" category of the FreeDNS section on the left column (it took me a bit to find where they disappeared).
  4. At this point, you should see your domain listed. Click on your domain name, and the current DNS status will be listed as "INACTIVE". That's fine, since we haven't yet set up the DNS zones, and we don't want to point the DNS until we have. Add the DNS zones as desired, and save them when done.
  5. If you want as little downtime as possible, now is the time to activate the DNS on Namecheap's side before pointing the nameservers. At the top, find the "Authorization by Email" paragraph by your DNS status and click "select authorization email". This will give you several email addresses on the domain to choose from, and Namecheap will send an email to confirm that you are indeed the owner of the domain. After you get that email and approve it, the DNS with Namecheap should change to active status.
  6. Once activated (or anytime prior to this if you don't care about downtime) point the nameservers to Namecheap. As per their KB, the nameservers are as follows:
    freedns1.registrar-servers.com
    freedns2.registrar-servers.com
    freedns3.registrar-servers.com
    freedns4.registrar-servers.com
    freedns5.registrar-servers.com
    Note that DNS changes can take up to 24-48 hours to propagate around the world.
  7. Once the nameservers are pointed to Namecheap and propagated, you're ready to set up Dynamic DNS as per the instructions below.
If the domain is completely pointed and the DNS zones are as they should be, you're ready to set up Dynamic DNS. This requires that you enable it on Namecheap's side, then have a client running on your side.
  1. Log into your Namecheap account, go to the "Hosted Domains" category of the domain manager, and pull up your domain's DNS zone editor.
  2. On the left, under "Advanced Options", click on "Dynamic DNS".
  3. Click on Enable Dynamic DNS. Make note of the password given.
  4. Configure the DDNS client of your choice with the settings in that section (unless you use my tool, you'll need to talk to their respective developers). For Mac/Linux/Unix users, feel free to try out my client found here.

ddns: a Dynamic DNS updater for Namecheap

For any Mac/Unix/Linux users out there, I've created an extremely lightweight dynamic DNS client I'm calling ddns. The current version is 0.82.
  • Only works with Namecheap's DDNS service, which is free. For information on how to set that side up, visit my post here
  • Updates the A Record (DNS zone) of your choice with your current IP
  • Written in bash and requires curl and awk, which most distros have. I've tested it on a Mac, but should work on any *nix system
  • Works in a cron job or as a one-time run, and logs successes or failures
  • No known bugs, but please email me at ddns@lotsaoxen.com if you find any!

Download ddns 0.82 here.

Download sample config file here.


If you download the client and use it, please feel free to comment here with suggestions, issues, and such. I can't promise to be able or willing to fix everything, but I'm interested in feedback.
Saturday, May 5, 2012

How to enable the root account login on OS X and other Unix and Linux systems

For security reasons, many Unix and Linux systems, including OS X and Ubuntu, install with a locked or disabled root account by default, with no password (not to be confused with a blank password). As such, it isn't possible to log directly into root shell or use su. Instead, the default user is given administrator access. That being said, below are three ways I found to access the root shell in the rare case it may need to be done.

Note: This presupposes the user already has administrator/superuser rights. Because of this, for most users the root account does not generally need to be enabled.

  • The following will open an sh or bash process with full root privileges: sudo sh sudo bash
  • The following will log you in with full root privileges: sudo su - If one runs su alone, it will prompt for the root password, but with sudo first it instead prompts for the current user's password. The dash at the end loads the root user environment.
  • The following sets a password for the root user, thereby enabling normal login for root: sudo passwd root On some systems, OS X not included, the following will reverse the last command, both disabling the root login and removing its password hash: sudo passwd -dl root
Some systems, including OS X, also have a special command, dsenableroot.
  • To enable root login: dsenableroot
  • To disable root login: dsenableroot -d


For more information:
  • Apple's official instructions for various versions of OS X using the GUI to enable root can be found here.
  • Ubuntu's site has a great article on various uses and misconceptions about sudo and root, as well as a few useful tricks, that can be found here.

How to solve "sudo: cannot get working directory" error

Periodically, you may get the following error:
sudo: cannot get working directory
This error means that the directory you are supposedly in no longer exists. You can fix this by simply moving to a different directory, i.e. your home:
cd

How to install the MySQLdb Python module on OS X Lion

These instructions have been tested on a machine running OS X Lion and Python 2.7.1, but should work for most any Intel setup. Most of the setup is explained in the README file included with the source, and the error at the end was solved per a thread here.
  1. Download MySQL for Python (the MySQLdb module) source from http://sourceforge.net/projects/mysql-python/ and extract the tar.gz file.
  2. Open Terminal and navigate to the source folder.
  3. Type the following to build the module: python setup.py build
  4. Then, install the module by typing the following: sudo python setup.py install
  5. In a perfect world, this would be all you'd need to do. However, if your computer was like mine, when you try to import the newly-installed module, it'll through the following error: >>> import MySQLdb Traceback (most recent call last): File "", line 1, in File "MySQLdb/__init__.py", line 19, in import _mysql File "build/bdist.macosx-10.7-intel/egg/_mysql.py", line 7, in File "build/bdist.macosx-10.7-intel/egg/_mysql.py", line 6, in __bootstrap__ ImportError: dlopen(/Users/username/.python-eggs/MySQL_python-1.2.3-py2.7-macosx-10.7-intel.egg-tmp/_mysql.so, 2): Library not loaded: libmysqlclient.18.dylib Referenced from: /Users/username/.python-eggs/MySQL_python-1.2.3-py2.7-macosx-10.7-intel.egg-tmp/_mysql.so Reason: image not found To fix this error, we'll simply make a symlink where libmysqlclient.18.dylib is expected to be to where it really is: sudo ln -s /usr/local/mysql/lib/libmysqlclient.18.dylib /usr/lib/libmysqlclient.18.dylib Note: you can also fix this issue by changing your path during install as per this suggestion.
Saturday, November 26, 2011

How to Show the User Library Folders in Mac OS X 10.7 (Lion)

By default, Lion hides the user library folders in the Finder. You can still open them by pressing Cmd-Shift-G and typing the folder name in manually, but if you access the folder often, this can prove tedious. Note that thus far, every update (10.7.1 and 10.7.2) has reset the folder flags to hidden, so a simple repeat of the command will make them reappear. Simply type the following into your favourite Terminal, and your user library will appear:
chflags nohidden ~/Library
Also, should you want to make all user libraries visible, use the following:
sudo chflags nohidden /Users/*/Library

Lion defaults tweaks

Many tweaks exist through the Terminal command defaults. Some of those specific to Mac OS X 10.7 have been included in Lion Tweaks, a standalone app. Also, there is a wonderful prefpane called Secrets, but while many of the tweaks available there still work on Lion, it has not yet been updated with new "secrets", so listed below are some of the tweaks I've found:

Disable resume for most Apple applications (replace appName with desired program, i.e. QuickTime, Preview, TextEdit...):
defaults write com.apple.appName NSQuitAlwaysKeepsWindows -bool false
Disable new window animation:
defaults write NSGlobalDomain NSAutomaticWindowAnimationsEnabled -bool false
Disable Mail reply animation:
defaults write com.apple.Mail DisableReplyAnimations -bool true
Disable Mail send animation:
defaults write com.apple.Mail DisableSendAnimations -bool true
Disable character picker:
defaults write -g ApplePressAndHoldEnabled -bool false
Use Snow Leopard-style Save dialog shortcuts (i.e. Cmd-D selects "Don't Save"):
defaults write NSGlobalDomain NSSavePanelStandardDesktopShortcutOnly -bool true
Disable iOS-style spelling corrections:
defaults write NSGlobalDomain NSAutomaticSpellingCorrectionEnabled -bool false
Show system info at login screen:
defaults write /Library/Preferences/com.apple.loginwindow AdminHostInfo HostName
Wednesday, November 9, 2011

How to Unstick a Stuck Mac App Store Download

Periodically you may try to install/download/update an app in the Mac App Store (MAS) and it will sit there "waiting" indefinitely. Restarting the MAS doesn't seem to help. What did work for me was the following:
  1. Quit the Mac App Store.
  2. Navigate to /Applications/Utilities/
  3. Open Activity Monitor.app
  4. Search for "storeagent".
  5. Select it, choose "Quit Process".
  6. When asked if you really want to quit the process, choose "Quit".
  7. Open the MAS and try to download the app again.

Note: Before you do this, you can also try holding Option, and it will give you a chance to "Cancel" the download, but this didn't seem to fix the issue for me.
Tuesday, June 28, 2011

Adventures in changing the black navbar in Google

Adding the following user styles to your browser should get it looking clean again:

Make black navbar white and remove navbar's bottom border:
#gbx4 {
background-color: #fffffff;
border-bottom-width: 0px;
}

Make the top text black again:
#gbg .gbgt {
color: #fff!important
}

Make the selected item black again:
.gbz0l .gbts {
color: #000;
}

Also, the settings icon for a white background is part of this:
http://ssl.gstatic.com/gb/images/b_8d5afc09.png

This isn't everything, but it's a start. Any comments and thoughts are appreciated!
Tuesday, May 3, 2011

Konami Code Javascript implementation

I developed this to navigate my site with various shortcuts. My specific implementation can be seen here, and allows various keypress sequences to go to different pages (try typing "home" right now, for example).

What makes this code unique is that there is no ever-increasing array to check against, thus keeping the runtime memory free as can be. It is also extremely flexible and allows for many codes with no slowdown and minimal tweaking (see my linked code above).

Note that this is not tested with Internet Explorer and likely does not work in said browser.


if (window.addEventListener) {

  //konami keypress code, plus as many other codes as you want
  var keyCodes = [[38,38,40,40,37,39,37,39,66,65]];

  //corresponding page(s) to load if the code is correct
  var urls = ["http://www.lotsaoxen.com"];

  //tracks state of keypress (starting at 0)
  var states = [];
  for (i=0; i<keyCodes.length; i++) states[i] = 0;

  window.addEventListener("keydown", function(e) {

    for (i=0; i<keyCodes.length; i++) {
      //if the most recent keypress matches, increment the corresponding state,
      //otherwise reset to zero
      if (e.keyCode == keyCodes[i][states[i]]) states[i]++;
      else states[i] = 0;
      //if the state matches the array length, go to page
      if (states[i] == keyCodes[i].length) window.location = urls[i];
    }

  }, true);

}
Sunday, March 13, 2011

Does the Actiontec GT701R DSL Modem support ADSL2+?

I recently upgraded from 7Mbps to 12 Mbps download from Qwest. My Actiontec GT701R DSL modem had done well thus far (I use a transparent bridge with my Airport Extreme), and after being warned by Qwest that my router probably wouldn't work with the higher speeds, I wasn't too concerned, as I figured I could buy a new one for cheap as necessary (they wanted to charge me $90 for a new one). I did check the product page for any information, and found this in the product FAQ (the poorly-placed comma in the title was there, too):
What is the maximum connection speed, that the Actiontec DSL Gateway support?
The maximum connection speed for an Actiontec DSL Modem or Gateway is 8Mbps downstream and 1Mbps upstream.

However, if the modem or gateway has a firmware update available that would upgrade it to ADSL2 or ADSL2+, then the maximum speed would be higher. The theoretical maximum speed for ADSL2 is 12Mbps and ADSL2+ is 24Mbps. But for ADSL2 or ADSL2+ to provide the higher speeds of which they are capable, the ISP must fully support the ADSL2 and ADSL2+ standard as well.
After perusing the internet for confirmation as to the "theoretical firmware update", I found a few people that posed similar questions but no answers.

A few days later, I awoke to the internet being down. It consistently failed to sync, and after resetting the router, I determined this was likely due to the speed upgrade. My last-ditch effort was to download a firmware update from Qwest (QW06.5-3.60.3.0.8.5 for Mac or Windows). After upgrading, the modem worked like a charm. This should also work with the GT701, as they use the same firmware.

So the answer is yes. If you have an Actiontec GT701R DSL modem with the latest firmware, it can at least support ADSL2+ at 12Mbps.

How to Override "No Ink" Error on a Canon PIXMA MX700

When a Canon PIXMA MX700 runs out of any ink, it prevents you from using it, giving the following error message:

U163: The following ink has run out. Replace the ink tank.
This can be a pain, especially when you want to scan, or if you still have black ink and that's all you need to use. There are two methods that will work to temporarily clear this until you are able to get new ink (which, by the way, is much, much cheaper if you use generic brands). These may also work for other Canon printers, but I haven't tried it. (Update: one or both methods have been confirmed to work on several Canon PIXMA models, including the JX210P, MG5220, MG5270, MG5470, MG6320, MP220, MP280, MP470, MP495, MP560, MP620, MP640, MP970, MP980, MX310, MX882, and MX885; more information might be in the comments. Thanks for the info!)

The first method uses the printer's "factory mode". There are some interesting settings in here, but I'm not sure of what everything does, so be careful with them. This works temporarily (as it seems to reset after a few days), and does not permanently disable ink level detection (as it correctly showed full ink after replacing it):
  1. Unplug the printer.
  2. Press and hold the Power button while plugging the printer back in.
  3. Continue to hold the Power button and press the Reset button twice.
  4. Let go of the Power button and wait 10 seconds. It will eventually show the number 1 on the LCD.
  5. Once the printer also shows "Idle" on the screen, cycle through the settings with the left and right arrow buttons until you see "USER MODE POWER OFF". Press the OK button.
  6. You should now be able to print or scan.
The second method is to simply press and hold the Stop/Reset button for at least five seconds. I didn't find this solution for a while because it's buried deep in the Canon KB, and haven't before used it. Be forewarned that Canon claims this stops the printer from detecting ink levels (I'm not sure if it means for the specific cartridge or as a printer setting).
Friday, December 10, 2010

Bugs and Annoyances in Office 2011

Last updated: 18:21, 13 December 2010

This list is in no particular order. I don't use Outlook or Communicator and thus probably won't run across problems with them. Let me know if there are solutions...

All:
  • The installer (and subsequent updates) require quitting Safari to finish.
  • The preferences windows, although similar to System Preferences in layout, contain a "Cancel" and "OK" button instead of a red x at the left top. When in one of the sections, clicking OK closes the entire preference window instead of the current section.

Word:
  • Bug: New windows don't open flush to the edge of the screen and menubar
  • The Find shortcut now takes you to a search section on the toolbar like the Google search section in Safari.
  • Bug: Assigned shortcuts sometimes refuse to work without restarting Word.
  • Hidden characters are blue when displayed.
  • Bug: If a document does not have focus, it can't be scrolled (neither two-finger scroll nor Cmd-click scroll).

Excel:
  • Bug: Cmd-A does not select all when editing text in a cell.
  • Bug: Cmd-Left doesn't skip to the beginning of a cell and Cmd-Right to the end when editing text in a cell. Cmd-Up does not move to the beginning of the text, but Cmd-Down moves to the end.

Visual Basic Editor:
  • VBE retains in the menu the application name that opened it. To exit VBA, you have to select the application menu (that says, for instance, "Word") and choose "Close and Return to Microsoft Word".
  • VBE doesn't show up as a separate program on the dock and can't be accessed with Cmd-Tab.
  • Bug: Cmd-` will rotate through the windows until it reaches your document (without changing focus), and then refuses to rotate back to VBE windows.


Thursday, December 2, 2010

How to Fix Broken Bullets in OpenOffice for Mac

This tends to happen when opening a .doc(x) file in Writer, or after saving it as a .doc(x) file from Writer then reopening the file. A temporary fix is to unbullet then rebullet the text, but upon saving and reopening, the broken bullets will return. For some, the character looks like a black clapperboard but for me (and in most other documented cases), the broken character looked like this:
Broken bullet character (size 197) retrieved with Unicode Hex Input keyboard (E000)

This has been filed as a bug since at least 2003, and the current bug thread, started in 2008, can be found here. It has something to do with a dependency on the Windows Symbol font, but I don't know why it hasn't yet been fixed.

I found a simple workaround in the openoffice.org forums here that worked for me. The post I used explained that one could copy the symbol.ttf font from Windows to do this, but the author also generated a version of the font to avoid licensing issues, which I've linked below. Here's how to fix it:
  1. Download symbol.ttf.
  2. Right-click on OpenOffice.org.app and choose "Show Package Contents".
  3. In the new window that comes up, navigate to Contents/basis-link/share/fonts/truetype/ and copy symbol.ttf into this folder.
  4. You should now see bullets correctly.
Saturday, November 20, 2010

Method for Checking the Values of Strings in Perl

Although I've been convinced that Perl is far from an ideal language to work with, I was required to recently do some text processing with it. Some strings seemed equal but apparently weren't because my code wasn't behaving as desired.

My brother came to my rescue twice, and came up with this handy script:
sub print_codes {
my $value = shift;
foreach (unpack("C*", $value)) {
print " '$_'\n";
}
}


Essentially one can pass the value of a string to print_codes() and it will print the codes for each character (including invisible ones) in the string.

In my case, we determined that 1. the input string was in UTF-16 (from a Gmail .csv export) but was being compared to a UTF-8 string, and 2. chomp was only removing \n and was leaving \r. Makeshift solutions for those issues:
  1. Remove extra \0 characters from the UTF-16 strings (careful if you deal with other languages, though):
    s/\0//g;
  2. Set chomp to remove \n\r at the beginning of your code:
    $/ = "\r\n";

Microsoft Office 2011 HUP Availability

14:25, 9 December 2010:
Update: Office 2011 is now available on the Home Use Program (HUP) site!

For those who qualify and have Macs, you've probably been wondering when Office 2011 will be available for the Microsoft Home Use Program. After some research on 26 October (when it was released for retail) turned up nothing, I sent a few emails and got this as a reply:
Thanks for your question. Office for Mac 2011 is expected to be available through the Home Use
Program in December 2010.

Let us know if you have any further question, thanks!
-Brittany

Further investigation revealed the Benefit Administrator FAQ from Microsoft (PDF or Google HTML cache), which contains the following statement on page 4:

"Office for Mac 2011 will be made available worldwide on December 9, 2010."

Here's to hoping...
Tuesday, November 9, 2010

How to Edit the Login Window in Snow Leopard

This shows how to open the login window files. It requires Apple's Developer Tools, which can be downloaded here for free if you have a free developer account.

I don't completely understand how the login window elements work together, so anyone with more knowledge can chime in through comments and I'll update this post. I do know these steps have worked since Jaguar (10.2) with some tweaks to the file location and without the compiled .nib file errors introduced with Snow Leopard's spring cleaning.

I recommend making a backup of the original .nib file. That way, if you somehow mess up and the login screen will not let you in, you can alway start up in Single User Mode and replace the copy with the backup. I also did all the changes through my root user so I didn't have to authenticate every change I made.
  1. Navigate to /System/Library/CoreServices/SecurityAgentPlugins/
  2. Right-click on loginwindow.bundle and choose "Show Package Contents".
  3. In the new window that opens, navigate to Contents/Resources/English.lproj/. If LoginWindowUI.nib shows as a folder, open and close Interface Builder, thus associating the .nib filetype.
  4. Open LoginWindowUI.nib and begin editing.

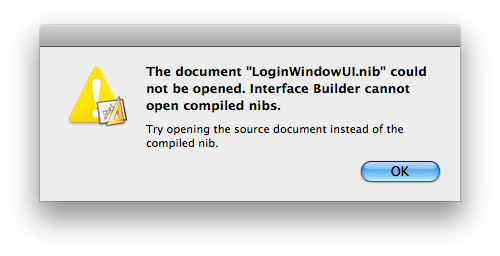
In Snow Leopard, the first time you do this, you will get the below error. Look here for information on how to get around this.
"The document "LoginWindowUI.nib" could not be opened. Interface Builder cannot open compiled nibs. Try opening the source document instead of the compiled nib."